Visioneer LX200 Specifications
Browse online or download Specifications for Bridge cameras Visioneer LX200. Visioneer LX200 Specifications User Manual
- Page / 59
- Table of contents
- TROUBLESHOOTING
- BOOKMARKS
- CONGRATULATIONS 3
- Table of Contents 4
- IMPORTANT INFORMATION 6
- VCCI INFORMATION 7
- PRECAUTIONS 7
- Camera Features 8
- System Requirements 9
- 1. The Camera 10
- Loading the Batteries 11
- Turning the Camera on and off 12
- LCD Menu Screens 13
- LCD Status Messages 17
- Turning the LCD On and Off 18
- Camera Ready LED Status 18
- Camera Memory 19
- Inserting the MMC/SD 20
- 2. Camera Mode 21
- MODE - VIDEO CLIPS 22
- MODE - SELF-TIMER 23
- MAIN MENU 24
- IMAGE SIZE 24
- EV - EXPOSURE VALUE 27
- WB (WHITE BALANCE) 28
- PRESET SCENE SELECTION 29
- BRIGHTNESS 30
- Using the SETUP menu: 31
- TIME-OUT 32
- PLAY LOGO 32
- LANGUAGE 32
- To format the: 34
- Digital Zoom 35
- 3. REVIEW MODE 36
- THUMBNAIL 39
- 4. Software Installation 40
- Windows Only 43
- For Mac Users: 46
- For Windows ME/2000/XP: 46
- For Mac: 46
- 6. Other Features 47
- Changing the TV Mode setting: 48
- Connecting to the television: 48
- Using the TV Menu: 49
- 7. Camera maintenance 51
- 8. Tips and Troubleshooting 52
- Tips and Troubleshooting 53
- 9. Camera Specifications 56
- Camera Specifications 57
- 513114-00 59
- Version 1.00 59
- Part Number: 05-0553-000 59
Summary of Contents
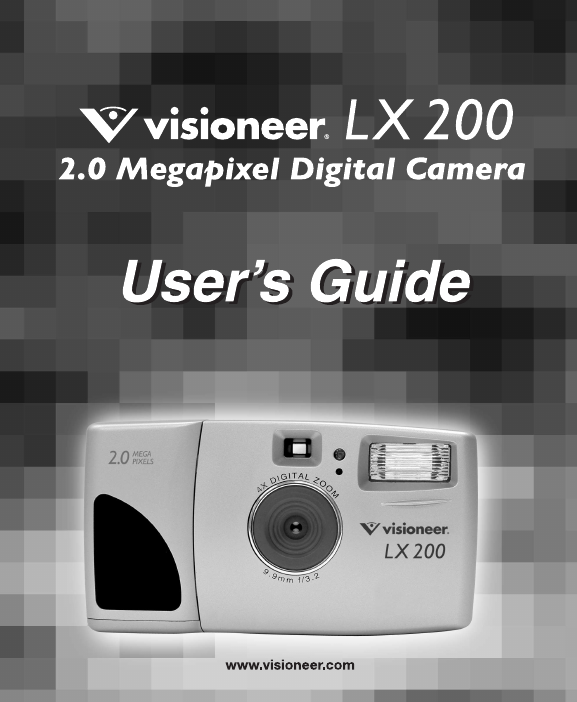
81. The CameraOverview of Your Visioneer LX 200FRONT/TOP1. Shutter Button2. Lug for Neck / Wrist Strap3. Viewfinder4. Self-timer LED5. Flash6. Flash S
9Loading the BatteriesThe Visioneer LX 200 uses 2x AA LR6 batteries.Loading the Batteries:1. Locate the Battery & Memory Card Door on thebottom of
10Turning the Camera on and offWhen the camera is turned on, the camera ready LEDon the back of the camera blinks and the LCD willdisplay the default
11LCD Menu ScreensModeSizeQualityFlashMAIN MENUMVideo ClipSelf-timerMain MenuMODE1600 x 12001280 x 960640 x 480OK MENUIMAGE SIZEFineNormalEconomyOK ME
12LCD Menu ScreensAWBSunnyFluorescentOK MENUWBTungstenMain MenuOK MENUWB– EXPOSURE VALUE +– Brightness +EVWBSceneBrightnessMAIN MENU+WBS–OffOffSCE
13LCD Menu ScreensFLanguageDefaultFormatMain MenuSETUPSETUPTime-out 60SDriver DSCTV PALPlayLogo O f fSETUPLanguageEspañolDeutschItalianoOK MENULanguag
14DeleteThumbnailBrightnessExitMAIN MENUDelete OneDelete AllMain MenuDELETEDELETETHIS FILE?NoYesDELETEALL FILES?NoYes– Brightness +LCD Menu ScreensV
15LCD Status MessagesMessages on the LCD indicate if the memory is full or if there is aproblem with the memory.1. MEMORY CARD IS FULL:The memory card
16Turning the LCD On and OffBy default, the LCD automatically turns onwhen the camera is powered on. Press toturn the LCD on or off.Using the
17Camera MemoryThe Visioneer LX 200 can store files in one of two ways using either thecamera’s 7MB internal memory or the removable MMC/SD. Memory ca
Technical SupportVisit Visioneer’s web site at www.visioneer.com for technical support including helpduring installation, driver updates, spare parts
18Inserting the MMC/SD Inserting the MMC/SD:1. Locate the Battery & Memory Card Door on thebottom of the camera.2. Slide the button on the Battery
192. Camera ModeTaking Images:1. Set the camera to Camera Mode by moving theMode Switch to .2. Position the subject in the viewfinder OR the LC
20MODE - VIDEO CLIPSTaking Video Clips: 1. When Video Clip is highlighted in the MODEmenu, press . 2. Press the Shutter button to begin recording
21MODE - SELF-TIMERSelf-timer:1. Highlight Self-timer in the MODE menu, thenpress . (fig.2.6)2. Use the and to highlight Off or On. 3. Pr
22SIZE1. In the SIZE menu, press or to toggle between 1600 x 1200, 1280x 960 and 640 x 480 pixels.2. Press OK to select the size and press MEN
23QUALITY1. In the QUALITY menu, press or to toggle between Fine, Normaland Economy.2. Press OK to select the quality mode and press MENU to r
24FLASH1. In the FLASH menu, press or to choose between Auto ( ),Flash ( ), and Flash Off ( ). 2. Press OK to select the flash mode a
25EV - EXPOSURE VALUE1. In the EV menu, press or to toggle between –2.0, -1.5, -1.0, -0.5,0, +0.5, +1.0, +1.5 and +2.0.2. Press MENU to exit.U
26WB (WHITE BALANCE)1. In the WB (WHITE BALANCE) menu, press or to choose betweenAWB, Sunny, Fluorescent or Tungsten.2. Press OK to select the
27PRESET SCENE SELECTION1. In the Scene menu, press or to choose between Party/Indoor,Beach/Snow, Sunset, Night Landscape, Fireworks and Off.2
1CONGRATULATIONSCongratulations on the purchase of your newcamera. Your camera has been carefully engineeredand manufactured to give you dependableope
28BRIGHTNESSUse this option to change the LCD brightness. 1. In the BRIGHTNESS menu, press or to toggle between theoptions.2. Press MENU to
29SETUPUsing the SETUP menu:1. Use or to toggle between the options.2. When the option is highlighted, use to change the setting.3. Pre
30TIME-OUTTo extend battery life, the camera willautomatically power off after 60 seconds ofinactivity. Use this option to change thedefault setting
31DEFAULTTo set your camera to its default settings:1. When the Default option is highlighted, press .2. The camera will reset to the factory default
32FORMATFormatting deletes all files. Use this option to format the internalmemory or the MMC/SD.To format the:•Internal memory – The MMC/SD card must
33Digital ZoomThe camera can use up to 4x Digital Zoom to take images.Using the Digital Zoom:1. In Camera mode, press ( T ) to zoom into the subject.2
343. REVIEW MODEIn review mode, you can review your captured images and video clips throughthe LCD. Using REVIEW mode: 1. Slide the Mode Switch
35MAIN MENUTo use the MAIN MENU in Review Mode:1. Press MENU to enter the MAIN MENU.2. Use or to toggle between the options.3. When the option
36DELETETo delete ALL files from the internal memory:1. When Delete All is highlighted in the DELETE menu, press .2. The next screen will read &quo
37THUMBNAILTo view files in Thumbnail mode:1. When Thumbnail is highlighted in the Main Menu, press toenter the Thumbnail mode.2. Use to na
2Table of ContentsImportant Information...4Precautions ...
384. Software InstallationNOTE: Do not connect the camera to your computer before the cameradrivers and software installation is completed.Installing
39Note for Windows 2000 Users:When this window appears (fig 4.2), click[Yes] to continue installation. (This messagewill also appear for "Univer
40NOTE: Windows 98 first edition users select only PC mode.5. Transferring Files to the ComputerYou can view and store the files you have captured wit
41Windows OnlyUsing the PC Driver ModeYou may use this mode to view your images with ArcSoftPhotoImpression.This mode allows you to take video clips o
429. Click on the Camera/Scanner Icon. (fig.5.2 c) A second window willappear showing the contents (pictures) of your camera’s memory, andoptions on h
43NOTE: Windows 98 first edition users select only PC mode.Note for Windows users: If switching between PC and DSC mode,please unplug your camera from
44For Mac Users:1. Set your camera to DSC Mode.2. Connect your camera to the computer.3. After a few moments, the external hard drive will appear on t
456. Other FeaturesWindows OnlyWeb Camera (PC Mode)You may also use the Visioneer LX 200 as a web camera and a videoconferencing camera. It will work
46TV ModeThe camera allows you to view individual files and record clips on thetelevision. To begin, check your television documentation to determinew
47Using TV Mode 1. Connect the camera to the TV.2. Turn the camera on.3. Slide the Mode Switch to .4. The TV will become a live viewfinder. Note:
33. Review ModeEnlargement ...34Viewing Video Clips ...
48Time-out1. In the TV MENU, press to highlight Time-out.2. Press to change the Time-out setting.Save1. In the TV MENU, press to highlight
497. Camera maintenanceCleaning the camera:Clean the outside of the camera by wiping it with a clean, soft and drycloth.Cleaning the lens, viewfinder
508. Tips and TroubleshootingSYMPTOMPOWERCannot turn on thecamera.The followingmessage appears onthe computer screenwhen opening anAVI file: “Cannotpl
51Tips and TroubleshootingSYMPTOMWeb cameravideo/picture/videoclip has poor quality.Flash picture takenis too light.Flash picture takenis too dark.Fla
52Tips and TroubleshootingSYMPTOMDaylightpicture/video cliptaken is too dark.Cannot take apicture/video clip.Image is blurredwhen lookingthrough thevi
53Tips and TroubleshootingSYMPTOMCamera is notresponding duringimage capture.There is somethingwrong with thecolor of thecaptured image.The LCD monito
549. Camera SpecificationsLensFocusingImage SensorImage SizeImageQuality/Image SizeSensor OutputSensitivityExposureEV compensationDigital ZoomImage St
55Camera SpecificationsOutput file formatOptical ViewfinderImage ReviewOn Screen Display(OSD)Menu on LCDFrame CounterMulti LanguageSupportSelf-timerFl
56Camera SpecificationsPower SourceBattery LifePower ManagementDimensionsWeightConnectivityWeb CameraVideo ModeSystemConnectivityPC SoftwareImage Refr
Copyright © 2002 Visioneer, Inc.Reproduction, adaptation, or translation without prior written permission is prohibited, except asallowed under the co
4IMPORTANT INFORMATIONFCC INFORMATIONFCC WARNING: This equipment meets the limits for a Class B digital device,pursuant to Part 15 of FCC rules. Only
5VCCI INFORMATIONThis is a Class B product, to be used in a domestic environment, based on theTechnical Requirement of the Voluntary Control Council f
6Camera Features•Stores approximately 8 Fine, 15 Normal or 27 Economy (1600 x 1200pixels) mode photos with 7MB internal memory•Virtually unlimited sto
7System RequirementsPC:•Microsoft Windows 98/ME/2000 and XP• IBM PC/AT or compatible, 200 Mhz or higher•Minimum 32MB RAM (64MB recommended)• USB Port•
Related products and manuals for Bridge cameras Visioneer LX200
 (66 pages)
(68 pages)
(66 pages)
(68 pages)
© 2020, manymanuals.com. All rights reserved. | 1.014 s |
 Manymanuals.com
 Manymanuals.de
 Manymanuals.fr
 Manymanuals.it
 Manymanuals.pl
 Manymanuals.cz
 Manymanuals.es
 Manymanuals-pt.com
Comments to this Manuals